A garage door that starts down, then reverses as if something is in the way, is usually reacting to its safety sensors. Before assuming the opener has failed, learn how to align safety sensors and check the few conditions that commonly put them out of position. A small shift from a bumped trash can, loose bracket, wet weather, or a dirty lens can stop the door from closing normally.
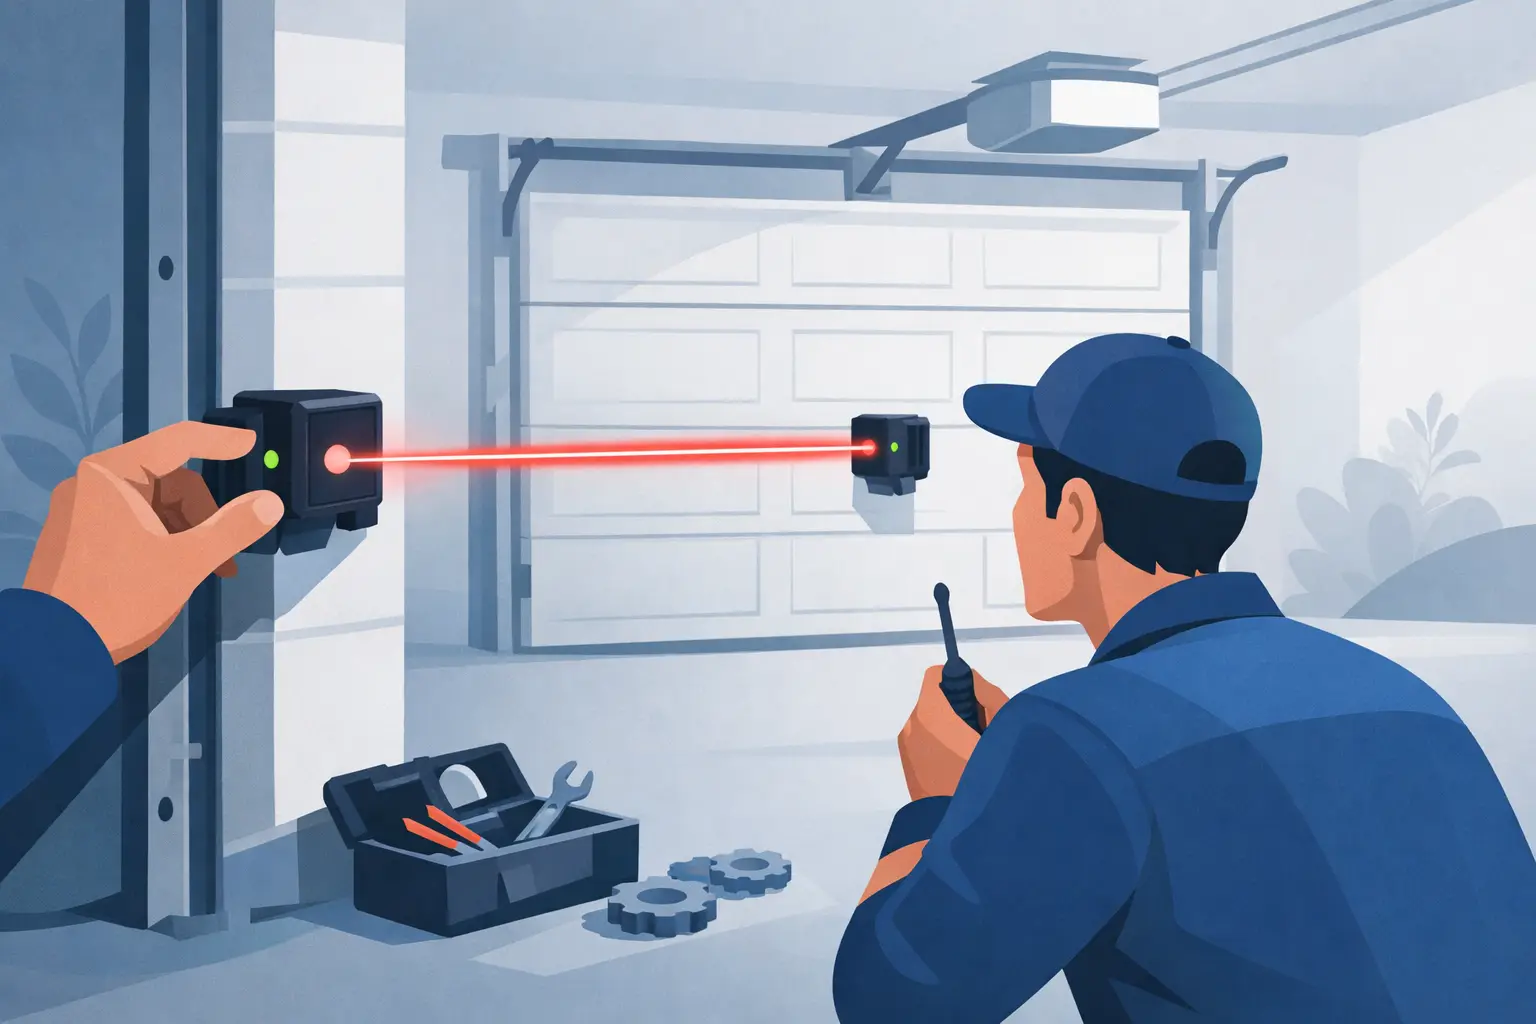
Modern garage door openers use two photo-eye sensors near the bottom of the door tracks. One sensor sends an invisible beam and the other receives it. When that beam is blocked or misaligned, the opener is designed to prevent the door from closing. That is a required safety feature, not a nuisance to work around.
What Garage Door Safety Sensors Do
Safety sensors are mounted on opposite sides of the garage door opening, generally no more than six inches above the floor. Their low position allows them to detect a child, pet, vehicle tire, tool, or other object in the path of a closing door.
When the two sensors can see each other, the opener receives a clear signal that the doorway is safe. If the beam is interrupted, the door should reverse or refuse to close with the remote. Many openers will still close when the wall button is held continuously, but that is a temporary diagnostic behavior, not a repair. Do not rely on it as a daily workaround.
The indicator lights on the sensors offer the first clue. On many systems, both lights should be solid when the sensors are powered and aligned. A blinking, dim, or unlit LED can point to misalignment, dirty lenses, damaged wiring, or a failed sensor. Light colors and blinking patterns vary by opener manufacturer, so use the opener manual if you need to confirm what your specific lights mean.
How to Align Safety Sensors Step by Step
Start with the garage door fully open, or disconnect the opener only if you can safely secure the door in the open position. Never work beneath a door that is unstable, off track, or partially open. Keep children, pets, and vehicles out of the area while testing the system.
1. Clear the Doorway and Inspect Both Sensors
Remove leaves, boxes, snow, salt residue, cobwebs, and anything else near the sensor path. In Chicago-area garages, slush and road salt can build up near the floor during winter and leave a film on the sensor lens or bracket.
Check that each sensor is mounted at a similar height and faces directly across the opening. Look for a bracket that has been bent, a sensor hanging loosely, or a track that has shifted. A sensor does not need to look perfectly level to work, but its lens must have a clear line of sight to the sensor across from it.
2. Clean the Lenses Carefully
Use a clean, soft microfiber cloth to wipe both sensor lenses. Avoid scraping at the lens with metal tools or soaking the sensor with cleaner. Dust, condensation, and spiderwebs can be enough to scatter the beam and cause an intermittent problem.
While cleaning, inspect the plastic housing for cracks or heavy moisture inside the lens. A cracked sensor housing may work inconsistently before failing completely, especially during cold or wet weather.
3. Check the Sensor Lights
With the opener powered on, look at the LEDs on both photo eyes. If one light is off, begin by checking its wiring connection and whether the sensor is receiving power. If both lights are on but one flashes, the sensors are likely not aligned well enough to complete the beam.
A solid light on the sending sensor and a blinking light on the receiving sensor is a common alignment pattern, though not universal. The key is to watch what happens as you make small adjustments.
4. Loosen the Bracket Just Enough to Adjust It
Do not remove the sensor or take the bracket apart. Loosen the wing nut or mounting screw slightly so the sensor can move by a small amount. Keep one hand on the sensor housing and make gradual adjustments left, right, up, or down until the indicator light becomes steady.
Tiny movements matter. Moving the sensor too far at once makes it harder to find the correct position. If possible, have someone watch the indicator light while you hold the sensor in place. Once the light is solid, tighten the fastener without twisting the sensor out of alignment.
5. Check the Wires and Track Condition
If you cannot get a steady light, inspect the low-voltage wires running from each sensor toward the opener. Look for loose wire staples, pinched insulation, exposed copper, cuts from yard tools, or damage from rodents. Do not drive a nail or staple through sensor wiring.
Also inspect the garage door tracks and lower roller area. A bent track, loose track bracket, or door that shakes heavily while moving can knock a sensor out of position again. Alignment repairs that keep returning often mean the underlying door hardware needs service.
6. Test the Reversing System
After both sensor lights are steady, close the door with the remote. Then test the safety feature using a solid object such as a cardboard box placed in the sensor path. The door should not close while the beam is blocked.
Next, test the opener’s reversing function separately. Place a 2-by-4 flat on the floor beneath the center of the door and close the door. It should reverse when it contacts the board. If it does not reverse, stop using the opener until it is adjusted by a qualified garage door technician.
Problems That Look Like Misaligned Sensors
Not every closing problem comes from the photo eyes. A door that reverses after touching the floor may have excessive close-force settings, binding rollers, worn hinges, or an uneven door. A door that will not move at all may have an opener, remote, power, spring, cable, or track issue instead.
Sensor trouble is most likely when the opener light flashes, the door reverses immediately before reaching the floor, or the door closes only while you hold down the wall control. Even then, the cause may be damaged wiring rather than the sensor position itself.
Sunlight can also affect certain installations. Strong direct afternoon sun entering the garage can interfere with a receiving sensor, especially if the lens is already dirty or marginally aligned. Repositioning the sensor slightly may help, but a technician may need to install a sun shield or evaluate whether the sensor itself is failing.
When to Call for Garage Door Sensor Repair
A quick cleaning and careful adjustment resolves many sensor issues. Call for professional service when the LED remains off after you check the connections, the wiring is damaged, the brackets will not stay tight, or the door has other mechanical symptoms such as grinding, shaking, sagging, or coming off track.
Do not bypass, tape over, disconnect, or permanently defeat garage door safety sensors. Doing so can expose people and property to a door that can weigh hundreds of pounds. It can also create liability concerns for rental properties, commercial facilities, and businesses with employees or customers near the door.
For homeowners, property managers, and commercial operators, Garage Door Mart Inc can inspect the sensors, wiring, opener settings, and door hardware in one service visit. That matters when a sensor issue is only the visible symptom of a track, roller, opener, or electrical problem.
A garage door should close when you need it to and stop when it detects an obstruction. If alignment does not restore that predictable operation, treat the issue as a safety repair rather than a minor inconvenience.